

Getting your accounting set up right from the start is one of the best things you can do for your business. Most small business owners put it off, then spend hours untangling a mess at tax time. QuickBooks is the industry standard for a reason: it handles the heavy lifting so you can focus on running your business. Here’s exactly how to set it up.
Step 1: Create Your QuickBooks Account
Head to QuickBooks and choose your plan. For most small businesses just getting started, QuickBooks Online Simple Start or Essentials covers everything you need. If you have employees, go with Plus or Advanced.
When you sign up, you’ll be asked a few basic questions: your business type, industry, and whether you have employees. Answer honestly since QuickBooks uses this info to pre-configure settings for you. Once inside, take five minutes to fill out your company profile under Account and Settings. Add your logo, business address, and contact info. These pull into your invoices automatically.
Step 2: Connect Your Bank and Credit Card Accounts
This is where QuickBooks gets powerful. Go to Banking in the left menu and click Add Account. Search for your bank and log in with your online banking credentials. QuickBooks will pull in your last 90 days of transactions.
Once connected, transactions flow in automatically every day. You review them, categorize them, and move on. This replaces hours of manual data entry every month. Connect every account your business uses: checking, savings, business credit cards, PayPal if you use it.
If your bank isn’t supported for automatic sync, you can upload CSV files manually. It’s more work, but still beats a spreadsheet.
Step 3: Set Up Your Chart of Accounts
Your chart of accounts is the backbone of your books. It’s a list of every category where money comes in or goes out. QuickBooks creates a default chart of accounts based on your business type, but you’ll want to customize it.
Go to Accounting, then Chart of Accounts. Review what’s there and add anything specific to your business. Common additions for small businesses:
- Owner’s Draw (if you’re an LLC or sole prop)
- Meals and Entertainment (separate from general expenses)
- Home Office (if you work from home)
- Subcontractors (if you hire 1099 workers)
Don’t overcomplicate it. You want enough detail to be useful at tax time, but not so many categories that categorizing transactions becomes a chore.
Step 4: Set Up Invoicing
If you bill clients, get your invoice template set up before you send a single one. Go to Sales, then Invoices, then click the gear icon to customize your template. Add your logo, set your payment terms (Net 15, Net 30, or due on receipt), and add your payment instructions.
QuickBooks lets customers pay invoices directly via credit card or ACH bank transfer through QuickBooks Payments. The fees are competitive and it dramatically speeds up collections. Turn it on.
Create a product and services list for everything you sell. Go to Sales, then Products and Services. Add each service or product with a name, description, and default price. This way you’re not typing out line items every time you create an invoice. Having clean financial records also supports you when you’re ready to build business credit.
Step 5: Set Up Basic Payroll or Contractor Payments (If Applicable)
If you have employees, you’ll need QuickBooks Payroll (add-on). It handles tax calculations, direct deposit, and filing payroll taxes automatically. Worth every penny compared to doing it manually.
If you only use contractors, you don’t need payroll, but you do need to track their payments for 1099s. Create a vendor record for each contractor, mark them as a 1099 vendor, and record every payment. QuickBooks will generate 1099 forms automatically at year end.
Step 6: Run Your First Profit and Loss Report
Once you’ve categorized a few weeks of transactions, run a P&L report. Go to Reports in the left menu and click Profit and Loss. Set the date range to this month or this quarter.
What you’re looking at: total revenue at the top, all your expenses below that, and net profit (or loss) at the bottom. This is the number that actually tells you if your business is making money.
Run this report monthly, minimum. If you’ve taken the step to form an LLC or corporation, clean financial records are especially important since your personal and business finances need to stay completely separate.
Step 7: Schedule a Weekly Bookkeeping Routine
The biggest mistake business owners make with QuickBooks is setting it up and then ignoring it for months. Block 30 minutes every week to:
- Review and categorize new bank transactions
- Check any invoices that are overdue
- Glance at your P&L to see where you stand
That’s it. Thirty minutes a week keeps your books clean all year and makes tax prep a non-event instead of a nightmare.
Common Setup Mistakes to Avoid
Mixing personal and business transactions: If you’re running personal expenses through your business account, stop. It muddies your books and can create legal problems if you’re an LLC.
Skipping bank reconciliation: QuickBooks has a built-in reconciliation tool. Use it monthly to make sure your books match your actual bank statements. It catches errors before they compound.
Not backing up your data: QuickBooks Online is cloud-based so data is automatically saved, but it’s still worth exporting a backup quarterly, especially before any major account changes.
Bottom Line
Getting QuickBooks set up properly takes a few hours upfront. That investment pays back every month in time saved, cleaner tax prep, and real visibility into how your business is actually doing. Start your QuickBooks free trial here and get it done this week.
Ready to Know Where You Stand?
The Business Journey dashboard maps your exact position across all 13 stages. Track your progress, unlock resources for each step, and build with a framework used by thousands of founders at Hustler's Library.
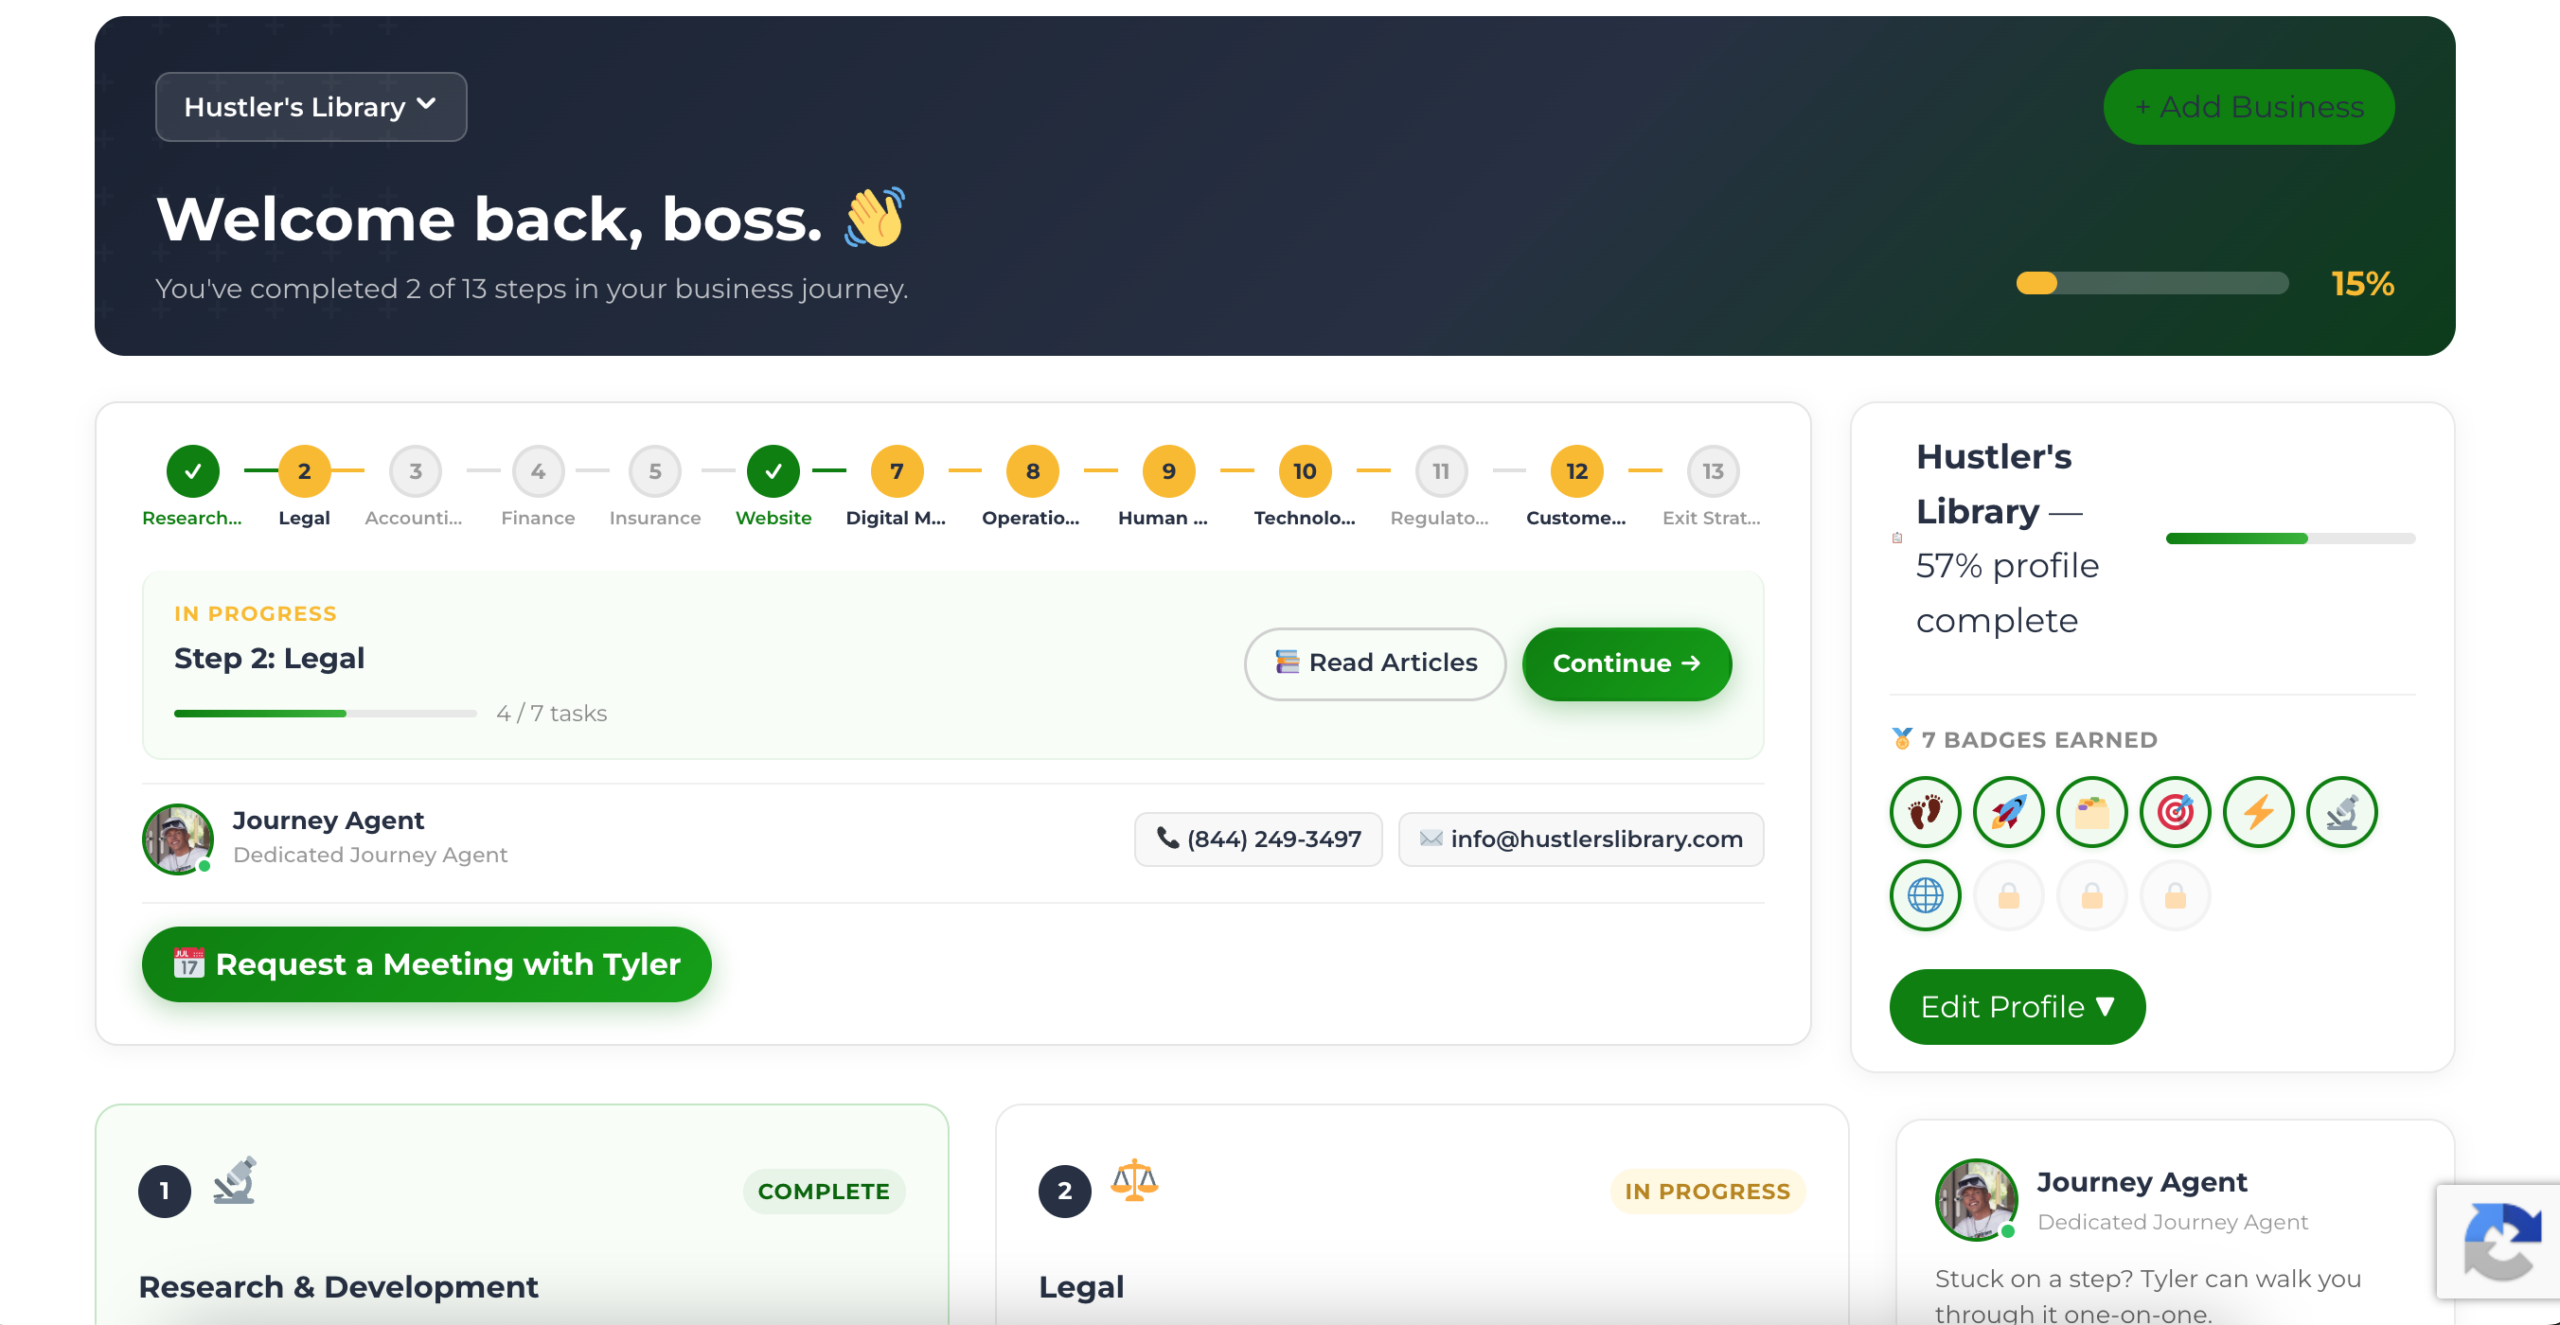
No credit card required · Takes 3 minutes · Personalized to your stage